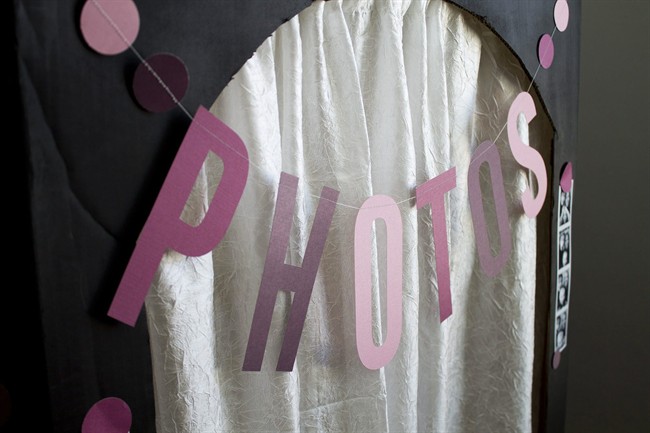
Photo booths at wedding receptions are at once old-fashioned and modern, harking back to the vintage coin-operated booths found in arcades but also seizing on the current obsession with snapping self-portraits.

The photo strips they deliver make great personalized wedding favours, or the pictures can be assembled into a creative guest book for the bride and groom.
As with all things wedding-related, renting a professional photo booth can be expensive. But if you’re willing to forgo some of the frills and focus on the fun, it’s possible to put together your own photo booth with little more than a cardboard refrigerator box (free from an appliance store), an iPad mounted on a tripod, and a bit of creativity.
There are numerous inexpensive or free apps that replicate the photo booth experience – I like Pocketbooth – and allow users to post pictures to social media or print them wirelessly using an AirPrint-enabled printer. But if you don’t want to deal with the hassle of a printer and paper, just save the pictures to your iPad. Guests will still enjoy snapping pics, and you can print out the best strips laterand include them in thank you notes.
While a cardboard box isn’t the most elegant set-up, a few coats of spray paint can transform it into a trendy chalkboard surface that can be embellished with lettering, garlands and other decorations. And this set-up is small enough to tuck away in a corner, where it will at least keep young wedding guests occupied.

Get daily National news
MATERIALS:
- cardboard refrigerator box
- box cutter
- ruler, pencil
- chalkboard spray paint
- wooden dowel
- fabric for curtain
- tripod with iPad mount
- iPad
- small chair or stool
- photo booth app, such as Pocketbooth
- optional: AirPrint enabled printer, photo paper
- chalk or chalk ink markers
- small wooden dowels
- adhesive-backed hook-and-loop tape
DIRECTIONS:
- Cut the top and bottom flaps off the box so you are left with a tall, narrow box open on both ends.
- Measure and cut a door-shaped opening on one side of the box, leaving a small lip at the bottom for stability. This will be the front of the booth.
- Set up the tripod on one side of the booth, with the iPad attached to it, positioned so the screen is held vertically and flat against the box. Figure out the correct position based on the height at which guests will be sitting in the booth. Trace around the screen on the box, and cut out the rectangular shape so the screen shows through to the inside of the box.
- Spray paint the outside of the box with chalkboard paint.
- If desired, paint the inside of the box another colour, or decorate it with paper or fabric.
- Cut two holes in the sides of the box close to the top front corners and insert a dowel so the curtain can hang over the doorway.
- Decorate the other sides of the box with chalk lettering and other embellishments. (For example: write “Pick a Prop,” “Strike a Pose” and other instructions, or print out a few sample photo strips.) Props such as silly moustaches, glasses and hats can be cut of cardstock and glued to small wooden dowels. Stick a long strip of adhesive-backed hook-and-loop tape to the box, and wrap a bit around the dowels so they can be stuck to the side of the box.
- To help users, print up some instructions to post inside the box. (For example, “If screen is blank, press ‘home’ button, tap Pocketbooth icon to open the app.”)

Comments