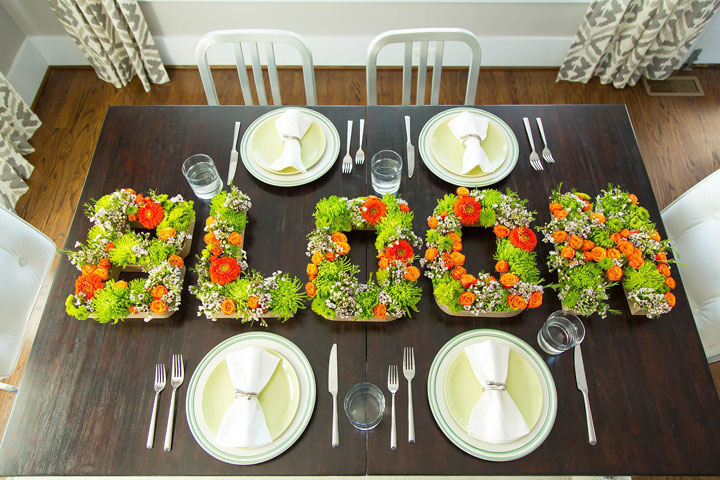
The signage craze has gone DIY. Wall letters – spelling out a simple greeting or saying – have been popular in home decor for years. Unadorned letters are also plentiful in craft stores for do-it-yourselfers.

You can find large and small alphabet letters in chipboard, papier-mache, wood or metal. What to do with them? There’s the fun.
“There’s a shift to an emphasis on personal invention” when decorating a room, says Marcie McGoldrick, editorial director of crafts for Martha Stewart Living.
“Word art” might mean covering letters in:
- glitter, tumbled glass or beads;
- found objects, such as pebbles, twigs and seashells;
- photographs and images;
- scrapbook, craft or tissue paper;
- fabric, lace, yarn, ribbon, pom-poms and sequins;
- faux flowers, moss or leaves;
- Legos and other small toys.
Paper quilling – rolled strips of paper – can be used to create elaborate, 3-D designs.
“You can really customize it and make it your own,” says Marianne Canada, an HGTV producer and stylist who hosts Crafternoon.
McGoldrick suggests using chalkboard paint on wood letters, or vintage decor paint for a crackled finish. Elmer’s Carpenter’s Wood Glue provides a similar look at less cost (instructions at Elmers.com).

Get breaking National news
Canada suggests cutting the fronts off papier-mache letters, removing any cardboard supports, and gluing decorations – such as colorful pom-poms – to the inside surfaces. Or insert floral foam and stick flowers into it for a special dinner or engagement party.
A single letter can be used as a monogram centerpiece, or letters can spell out party themes, such as “bloom” for a summertime party, “boo” for Halloween or “thanks” for Thanksgiving.
Lightweight chipboard letters can be hung from banners, Canada says, or covered with family photographs as “a sweet gift for a grandparent.”
Create three-dimensional wall art by decorating several letters and gluing them together to hang for a holiday.
“‘Noel’ looks great over a mantel or near a Christmas tree,” Canada says.
Those lighted marquee letters popular at craft and design stores right now? Make your own for less using papier-mache or metal letters. Just be careful to use only LED light bulbs or strands – globe or “cafe” bulbs lend an authentic look – to reduce any fire hazard. Directions for one such project are below.
McGoldrick says large letters should be used sparingly in home decor; treat them like an accent pillow. Or bring them out only to add zing to a party or holiday.
“It’s not something you’re going to get sick of if it’s out for a few weeks and then goes away,” she says.
—
Lighted Marquee Letters by HGTV
Supplies:
- 24-inch-tall papier-mache letters
- Globe string lights
- Spray paint
- Craft knife
- Ruler
- Pencil
- “D” ring picture hangers
Assembly:
- Use the craft knife to cut along the letter’s outside edge and remove the front; discard cardboard support that may be inside.
- Flip letter over – backside up – on a flat surface. Using a pencil, plot where each bulb will be inserted. Make a mark at the top centre of the letter, where the first bulb will go. Then, using a ruler, draw a centre line down each part of the letter. Using this line as a guide, space the marks equally about 2-1/2 inches apart. Use the craft knife to cut a small X over each mark. To widen the opening, push your finger or pencil into it.
- Use smooth, sweeping motions to coat each letter lightly with spray paint and let dry. Repeat coats as necessary for solid colour coverage.
- Once the letter is dry to the touch, add the string lights: Pop a bulb through the opening on the front, and then screw the bulb into the socket behind. Wrap excess cord around each socket as you go to keep cords hidden from view. Add the picture hangers to the back of each letter to hang the finished sign, or prop them against a wall for a more casual display.


Comments
Want to discuss? Please read our Commenting Policy first.